Showing posts with label Puddings. Show all posts

Friday, 18 January 2013

Kao Nio Ma Muang (Mango with Sticky Rice)


In 2008 i was lucky enough to have the opportunity to spend a few months travelling around South East Asia and it was during this trip that my interest in cooking and ingredients really began. After a number of weeks sampling the culinary delights of Thailand, Cambodia and Vietnam, Matt and I (a very fine gentleman from Gloucestershire that i had ended up travelling with) were spending a few days in the Northern town of Chaing Mai.

Matt and I were both single men at the time and we decided one day to spend some time on personal improvement, arming ourselves with abilities that would make us more attractive to the opposite sex. We signed up for a local cookery course, hopeful that being capable of throwing together an exotic meal would entice girls into our beds, and also a traditional massage course, for when we got the said girls into our beds. 

The course was great fun and even included a trip to the local market where we learnt more about the ingredients used in the actual class later in the day. We were taught how to make a number of savoury dishes as well as a traditional Thai desert, which i'd enjoyed many times from the excellent street vendors across the country, of sliced mango with delicious coconut sticky rice.

Unfortunately after the day of cooking Matt and I decided we deserved a few drinks and ended up getting so drunk on Chang beer that we had to cancel the massage course the next day and leave our personal improvement there. Luckily for me, once back in the UK, i stumbled across a girl called Rachel and while she does enjoy a nice massage she loves her food that little bit more!


While writing this i flicked through some of my photos from the trip and found this one where i think the knife skills on show prove how far i've come over the last 5 years! 


Ingredients for 4-6 portions

275g of Thai glutinous (sticky) rice
One 400ml can of good quality coconut milk
3 tbsp of palm sugar (or substitute brown sugar)
Approx half a tsp of salt

2 ripe mango

  • Soak the rice in fresh cold water, minimum 4 hours or even better overnight.(you can skip this step if you have to!)
  • When ready to use, wash the rice with fresh water at least twice.
  • Steam the rice if you have the equipment, about 30 minutes, or boil the rice in just enough water with a lid on, stirring regularly.
  • Put the coconut milk, sugar and salt in another pot and bring to the boil.
  • Pour over the cooked sticky rice, mix well and allow to cool slightly.
  • Serve with fresh mango slices. How to slice

While on the cookery course we also topped with a few roasted mung beans, but i've never done this at home and can't remember how nice it was....

Tuesday, 6 November 2012

Pumpkin Pie


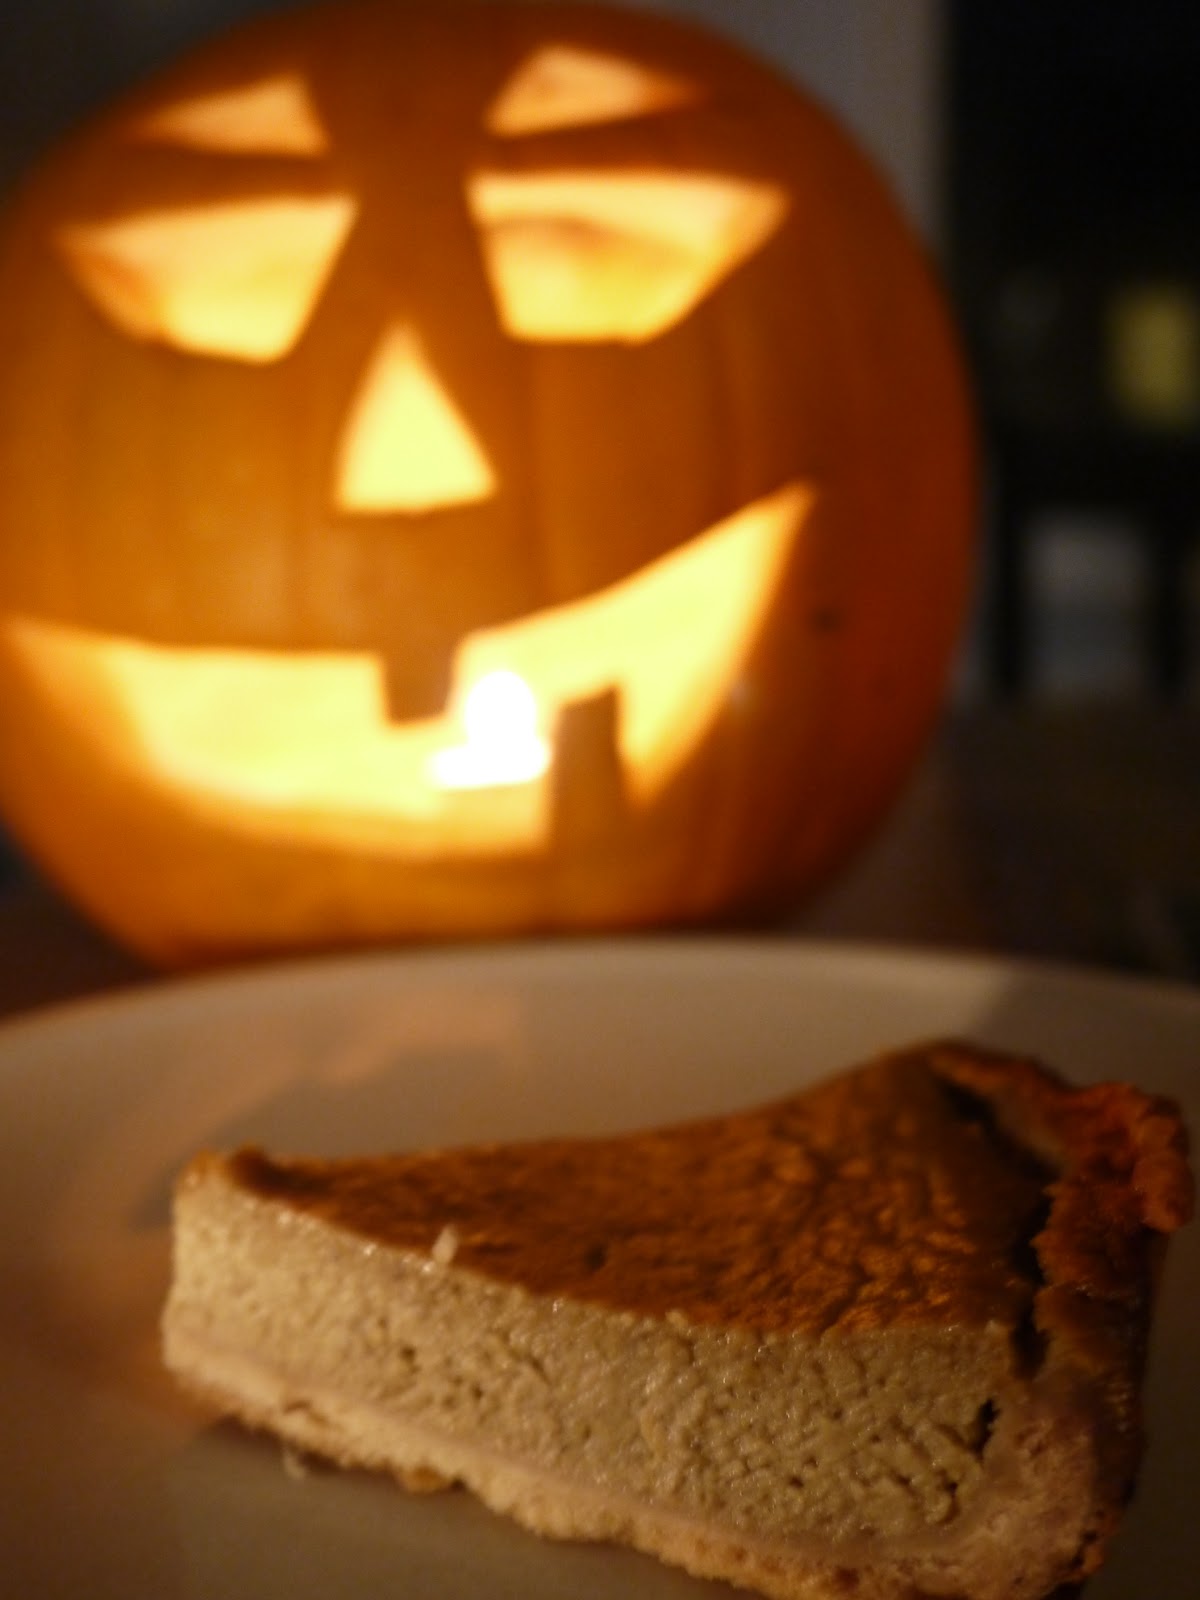
Two firsts for Halloween this year. My first solo pumpkin carving and a first attemt at a pumpkin pie, neither of which ended up being that neat or pretty. They were fiddly and at times irritating but once finished they both filled me with a pleasing sense of satisfaction.

I've never even eaten pumpkin pie before so i don't know if this can be described as a good one but in terms of something tasty to eat then it's a winner - really moist, a similar texture to a lemon tart but with warming winter flavours.


Ingredients -

Approx 500g of fresh (peeled) pumpkin flesh, cut into 1 - 2 inch cubes.
Olive oil
Honey 

1/2 tsp freshly ground Nutmeg
1/2 tsp ground Cinammon
1/2 tsp All Spice
100ml Double Cream
2 small Eggs
Dash of Dark Rum
125g Light Muscovado Sugar

Approx 250g shortcrust pastry, homemade or packet

Tbsp Icing Sugar

  • Put the pumpkin in a baking tray and drizzle with olive oil and honey, toss to coat, then roast in a pre heated oven for around 45 mins at 190c until pumpkin is soft and slightly charred on some edges.
  • Allow the pumpkin pieces to rest in a sieve over a bowl, while you prepare the pastry, to let as much liquid as possible drain away.
  • Roll out the pastry to around the thickness of a pound coin and place inside a 22cm tart tin, push into the case and trim excess pastry.
  • Line the inside with baking paper filled with baking beans or rice and dry bake for 15 mins at 180c.
  • While the pastry is baking put the roast pumpkin, spices, cream, eggs, sugar and dark rum in a bowl and blend together.
  • Take the baking paper out and allow the pastry to cook and brown for another 10 min then remove from the oven.
  • Turn the oven down to 140c.
  • Pour in the spicy pumpkin mix and cook for around 1hr, if you poke a knife into the middle it should come out clean, you may well need another 10 mins or so.
  • Remove from the pie from the tin and allow to cool on a wire rack.
  • Dust with a little icing sugar and serve with a drizzle of cream.

Monday, 28 May 2012

Sticky Toffee Pudding


Last year, during a trip to the Lake District, Rachel and I had the opportunity to visit what for us is the equivalent of an Elvis fan's trip to Graceland.
 
We both have a sweet tooth and for me in particular the classic British dessert 'Sticky Toffee Pudding' is my favourite. So it was with extreme excitement that we wound our way down through the beautiful countryside from Hawkshead Hill, after a delightful stay at - Summer Hill Country House, to Cartmel.

Cartmel is a small village in the south of the Lake District famous for one thing - being the home of the greatest dessert our fair shores have to offer. 

Having bought one of the puddings as a souvenir we arrived 2 hours later back in Manchester at my mother's house to drop off the car she'd very kindly lent us for the last few days. While unpacking i decided to show my gratitude for the car loan and offered Ma Foster the aforementioned Cartmel Sticky Toffee Pudding and carefully put it in the fridge for her to enjoy another day.

The following day we were getting ready to head to the station for our train back to London, which my Mother had generously offered to drive us to. Before heading off i stuck my head in the fridge to see if there were any last snacks i could nibble at and my eyes landed on the sticky toffee pudding...

It had been 24 hours since we'd experienced the delicious taste up in Cartmel and i found myself craving another hit.

And so, and looking back now with a little hint of guilt, i rescinded the offer to leave the pudding. I took back the gift I'd felt so good giving just the night before and stuck it back in my bag with a smile on my face knowing that i could enjoy that incredible taste once again later that evening...

Having polished that off in no time i thought it might be worth cooking one from scratch myself, so using the memories from Cartmel as inspiration i did and the recipe is below. I think i should probably make one for Mrs Foster or at least buy her one of the originals that I've noticed you can now buy in Waitrose.

Ingredients, for approx 10 portions -
Chopped Dates

250g dried dates, stoned and chopped
300ml black tea, medium strength
¾ tsp bicarbonate of soda
100g unsalted butter, softened
200g golden caster sugar
2 large eggs
200g self raising flour
Tsp vanilla essence
Tsp cinnamon
½ tsp allspice
½ tsp nutmeg


For the toffee sauce -
100g unsalted butter
100g light muscovado sugar
150ml double cream


  • Preheat oven to 160C Fan / 180C Normal
  • Put the dates and tea in a saucepan and bring to the boil, cook for around 6 minutes until the dates are softened. Stir in the bicarbonate of soda
  • Beat the butter with the caster sugar until pale and creamy
  • Add the eggs and continue to beat, add in the flour, vanilla essence and spices, ix to combine
  • Fold in the date and tea mixture and pour everything into a large lightly buttered ovenproof dish
  • Bake for around 35 minutes, the top should be just firm to the touch
  • While that's baking make the toffee sauce - Add all the ingredients to a saucepan and warm over a low heat, stirring until the sugar has dissolved and you have a smooth sauce
  • To serve cut the pudding into squares, drizzle over the toffee sauce and pour over hot custard.

Friday, 16 March 2012

Nutella Mug Cakes

Photo courtesy of Sarah Gatehouse


Are you mugging me off !?

A freshly prepared, hot chocolate cake with beautiful gooey centre ready in less than 5 minutes? Made with ingredients you probably have in your kitchen cupboards already...

You may think I've gone nut(ella)y but it is possible, I promise you, I'm not taking you for a mug, I'm just showing you how to prepare a super fast, delicious desert in one!


Ingredients, for 4 mugs - 

8 Tbsp Self Raising Flour
8 Tbsp Granulated Sugar
2 Eggs
6 Tbsp Cocoa Powder
6 Tbsp Semi Skimmed Milk
6 Tbsp Nutella
6 Tbsp of Vegetable or Olive Oil

  • Combine all of the above in a large bowl and whisk together with a fork until smooth.
  • Separate the mixture between mugs, half fill each.
  • Cook each one in the microwave for 90 seconds - 3 minutes, depending on oven wattage and size of portion, until the pudding has risen and set on top.

Serve with vanilla ice cream

Tuesday, 6 March 2012

Grasshopper Squares


I'm not sure if I've mentioned previously but i am partial to a chocolate brownie or two... Another thing i love is after eights chocolates and will eat a whole box given half a chance!

Imagine combining the two.

Grasshopper squares do this; mixing the best aspects of two great things to make something even more amazing like taking the best bits of Carmen Electra, ass, and Elle Macpherson, legs, and creating a perfect lower portion of the female form.

My choice of lady pin up might be showing my age there... I wonder who the kids fancy these days? That mechanic chick from transformers i bet, or maybe Cheryl Cole is still popular with the naive younglings? Taking a quick flick through FHMs top 100 girls of 2011 i don't even recognise half the names...

Surely none of these young pretenders can hold a candle to Tiffani Amber Thiessen in her prime anyway?

I digress.... the grasshopper squares are immense and well worth the little extra effort it takes to make the three layers, so if you're a fan of mint and chocolate, give them a go!

Ingredients -

For the brownie base:
100g good quality dark chocolate, 50g butter, 125g golden caster sugar, 2 eggs, 50g plain flour, 1/2 tsp baking powder, 20g cocoa, 1/4 tsp vanilla essence.

For the mint ganache layer:
200g good quality white chocolate, 100ml double cream, 3tsp peppermint extract, green food colouring.

For the chocolate icing top:
150g dark chocolate, tbsp of golden syrup, 50g butter

  • First preheat your oven to 180C/160C not fan/fan and line an approx 22cm square baking tin/dish with greaseproof paper. 
  • For the brownie base - melt the butter and chocolate in a microwave or in a bowl over simmering water, leave to cool.  
  • Beat eggs, vanilla essence and sugar together until mixed, thick and pale. 
  • Fold the chocolate mixture into the egg mixture then sift over the flour, baking powder and cocoa, fold this through until evenly mixed. 
  • Pour into the baking dish and put in the oven for 15-20 minutes, the middle should just be set. Leave to cool in the tin.  
  • Now the mint ganache - Chop the white chocolate into small pieces and place in a bowl. 
  • Heat the cream until just simmering, then pour over the white chocolate, Allow to sit for a few seconds and then stir until the chocolate has melted. Add the peppermint extract and a drop of food colouring so you have a pale mint colour or whatever green colour you're aiming for. 
  • Cool until thickened then spread evenly over the brownie base. Put in the fridge for approx 45 minutes until the ganache has set.
  • Lastly the chocolate icing - Break the dark chocolate into pieces and place in a bowl with the syrup and butter. Gently melt in a microwave or in a bowl over simmering water. 
  • Cool until it won't melt the mint ganache layer, then spread evenly on top. 
  • Put it back into the fridge for 1 hour.
  • Take the whole thing out of the baking dish, remove paper, trim the edges and then cut into small squares .

Monday, 13 February 2012

Caribbean Rum Muffins with Lime Kulfi


This started with a simple idea one Saturday morning to cook some muffins and evolved into an international dessert with influences as far apart as India and the Caribbean, the Mrs was away for the weekend and i get bored quite easily if i'm not kept entertained...

We were in the middle of a particularly vicious 'cold snap', minus 5 outside, and i was looking for something spicy to warm me up, the sash windows may look lovely but they let in a bit of a draft... Noticing the remnants of a bottle of Havana Club rum on the shelf i could feel my belly warming already and grabbed the bottle. About to take a big swig i remembered that despite the snow on the ground my lacrosse game was still on and i was due to be running around a field in a few hours time. So, realising that getting half drunk was probably not an option anymore, at least until the official call came that the game had in fact succumbed to the weather, i decided to bake some muffins and add some rum into the mix, along with a good sprinkling of nutmeg and cinnamon.

These were great as a warming snack with a big mug of coffee but once the game was finally called off the mind started wandering to how they could be improved, what goes great with rum....? Well Coca Cola obviously but i couldn't think of how to add coke to the muffins... What else? Lime, perfect!

So first of all i made a thick lime cream from whipping cream, a little condensed milk and lime juice, which went well but didn't add enough wow factor and i still had almost a whole can of condensed milk left over... It was then that i remembered seeing a recipe some time ago for Kulfi and that basically it was made with whipped cream and condensed milk, so decided to have a go at that. kulfi is Indian ice cream, denser and creamier than normal ice cream, stopping it melting so quickly (handy in India), and creating an even more luxurious taste.

We first tried Kulfi in Mumbai, purchasing 2 generous slabs, served on large banana leaves, from a kulfiwallah on Chowpatty Beach and sitting back to enjoy the intense and creamy flavours while people watching during a monsoon downpour. We were told by many happy men that the rain was 'very very good', i don't think Rachel or i could really get on board with how 'very very good' the rain was but we sure thought the Kulfi was head wobblingly splendid!
 

Ingredients -

Approx 10 Muffins:
125g unsalted Butter, softened
110g Sugar, i used golden caster
2 large Eggs
300g Plain Flour
2 tsp Baking Powder
1/2 tsp Salt
1/4 tsp ground Cinnamon
1/4 tsp freshly grated Nutmeg
125ml Milk
5 tbsp Caribbean Rum
3 tbsp Dark Muscovado Sugar (or whatever you have in)

Lime Kulfi:
300ml tub of fresh Whipping Cream
350g Sweetened Condensed Milk
6 tbsp freshly squeezed Lime Juice


Start by making the kulfi -
  • Whip the cream until firm
  • Stir together the lime juice and condensed milk in a separate bowl
  • Fold the lime mixture through the cream
  • Whack it in the freezer in a large tub or small individual containers and cover with cling film.
Next the Muffins -
  • Preheat oven to 175c/190c (fan/non fan)
  • Beat almost all of the butter until creamy in a large bowl, keep a little aside for greasing later
  • Add the caster sugar and continue beating
  • Break the eggs in one at a time while still beating
  • In a separate bowl mix the flour, baking powder, salt, cinnamon and nutmeg together
  • Combine 3 tbsp of the rum with the milk
  • Add a quarter of the flour mixture to the butter mix along with a quarter of the milk mix, beat until smooth. Repeat the process until it's all mixed in.
  • Rub the last little bit of butter evenly into the inside of a muffin tin and spoon the mixture into approx 10 of the pans, you should fill them approx 3/4 full.
  • Bake until golden, 20-25 mins
  • Remove from oven, take out of the muffin tin and allow to cool on a wire rack.
  • Add the muscovado sugar and remaining 2 tbsp of rum to a small pan, warm on a low heat and stir until fully dissolved.
  • Brush this over the warm muffins to give a lovely even glaze (unlike mine, i didn't have a brush so tried to pour it over, i was tempted to use Rachel's tooth brush but it may have added a weird minty taste and i like my girlfriends to have teeth)

Friday, 13 January 2012

Blondies

All relationships need spicing up every now and then, so Rachel and I decided to add a hot blondie to ours for the evening.

On a cold winter night we took our relationship to the next level, a beautiful blonde was invited into our home, it was a little different, exciting, the smell was intoxicating...

We couldn't help ourselves and grabbed and pulled, we were delirious with pleasure.... they were all warm inside and tasted delicious!

Chilli Blondies or White Chocolate and Chilli Brownies. Whatever you want to call them they are like catnip to chocolate and chilli lovers and Rach and I are perhaps the biggest fans of both!

Ingredients -

200g Butter,
300g good quality White Chocolate, chopped
3 Medium Eggs
150g Caster Sugar
1/2 tsp Vanilla Extract
200g Plain Flour, sifted
Pinch of Salt

For the chillis -

2 Red Chillis
100g Caster Sugar
150ml Water


  • Heat the oven to 180C / 170C Fan
  • Line a small rectangular roasting tin or oven proof dish (Approx 25cm square) with grease proof paper
  • Cut the chillis in half lengthways, deseed and finely slice
  • Put the chillis, sugar and water in a pan, bring to the boil and simmer for approx 5 minutes
  • Melt half of the chocolate and all the butter in a bowl over simmering water or in the microwave, mix well and then leave to cool slightly
  • In a large bowl beat the eggs, sugar and vanilla together until pale, then beat in the chocolate mixture
  • Fold in the sifted flour and salt, then fold in the remaining chocolate
  • Drain the chillis and mix 2/3 of them into the mix
  • Pour the mixture into the baking dish and sprinkle the remaining chillis over the top
  • Bake for approx 25 mins or until the top is just firm and slightly golden (see above)
  • Cool in the dish then remove and cut into squares.
  • Try a bit of the edges, where it is a little firmer, while still warm, mm mm!

Wednesday, 21 December 2011

Baked Ginger Cheesecake

Gingers get a hard time in most walks of life, recent survey results show that they are 10% less likely to succeed at a job interview and 6% less likely to win the lottery than their blonde or brunette peers.

In the spice world however things couldn't be more different. The popularity of ginger in Asian cooking is unparallelled and no one can argue that ginger spice had more teenage boys salivating in front of top of the pops than any of the other spices on offer!

So....

Every boy and every girl
Spice up your cheesecake
People of the world
Spice up your cheesecake

Ahhhhhhhhh......


Ingredients - 

15 Ginger Nut Biscuits
40g Melted Butter
600g Light Cream Cheese
Tbsp Plain Flour
2 Eggs
Tsp Vanilla Extract
100g Golden Caster Sugar
300ml Soured Cream
80g Crystallised Ginger, finely chopped
Icing Sugar, for dusting

 
  • Preheat the oven to 180C or 160C for fan ovens
  • Crush the biscuits into crumbs or blitz in the food processor, add the melted butter and stir in
  • Press evenly into the bottom of a lightly buttered 20cm springform tin and bake in the oven for 5mins, remove and cool
  • Beat the flour, cream cheese, eggs, sugar, vanilla extract and half of the soured cream together until smooth. Add the crystallised ginger as evenly around the mix as you can and give it all a quick stir.
  • Pour the mixture into the tin and bake for 35 minutes. Check to see if the cheesecake has set but still has a slight wobble in the centre. That's where you need it to be so if it's too soft return to the oven for a few more minutes.
  • Add the rest of the soured cream to the top and spread around evenly before returning to the oven for 5 minutes
  • Cool in the tin and sprinkle with icing sugar to serve (i'd run out...)

Friday, 18 November 2011

I Love Brownies (and their creator)

You know that moment when you look at someone and realise for the first time that you truly truly love them, always will and will spend the rest of your lives together?

I experienced that feeling the very first time i ate one of my girlfriends triple chocolate brownies.

I Love You, I Love You, you have made me the happiest person in the world!
I think this must be how it feels for a woman when the man they love proposes to them...


The fact the recipe is actually one of Anthony Worral Thompsons doesn't change how much i love Rachel but it does mean i feel some of that very same love for the little yorkshire terrier, and have no problem with that... He might though if i ever meet him, Rachel accuses me of 'Lennying her' on occasion and the celeberity chef will get some of the same treatment!

Here's the recipe - so if you're a girl and looking to tie a good man down or a guy and don't want to rely on a woman for anything then give it a try!
Most recently i served the brownies warm with ice cream and drizzled with a little blackberry coulis (red berries would also be lovely!)
 

Ingredients -
275g/10oz plain chocolate (70% cocoa solids)
275g/10oz unsalted butter
85g/3oz pecans, broken into pieces
85g/3oz milk chocolate, cut into large chunks
85g/3oz white chocolate, cut into large chunks
175g/6oz plain flour
1 tsp baking powder
4 large eggs, lightly beaten
1 tsp vanilla essence
325g/12oz caster sugar
 
For the Coulis -
250g Blackberries
50g Golden Caster Sugar
1/2 tsp Vanilla Extract


  • Preheat the oven to 170C/325F/Gas3. Line a 30x20cm tin or dish with lightly buttered greaseproof paper.
  • Put the plain chocolate and butter in a large bowl and melt ( microwave will do ). Sieve the flour and baking powder into a bowl.
  • Stir the sugar into the melted chocolate then add the eggs and vanilla essence. Fold in the flour and baking powder, nuts and chocolate.
  • Pour the chocolate mixture into the prepared cake tin. Place in the oven and bake for 20-25 minutes.
  • The top should be firm but the inside should feel soft when cooked, it should have a little shake to it! Cool and then chop into small bite size or big fist size squares
For the coulis -
  • Put the blackberries and sugar into a small pan with 100ml/31⁄2fl oz water. Bring to the boil, then simmer for 5 mins until the fruit is soft. Stir in the vanilla, remove and cool a little.
  • Tip the contents of the pan into a blender or food processor, and whizz to a purée, then strain through a sieve, rubbing it through with the back of a ladle or spoon.
 
Serve the brownie warm with good quality vanilla ice cream drizzled with the coulis.